For all of you interested, I’m now building a Pocketship Sailboat from CLC Designs. I’d love to have you as a follower if you have interest in following along.
The site address is: idahopocketship.wordpress.com
Best,
Brent
For all of you interested, I’m now building a Pocketship Sailboat from CLC Designs. I’d love to have you as a follower if you have interest in following along.
The site address is: idahopocketship.wordpress.com
Best,
Brent
Northern Cross has officially sold to a gentleman from the San Juan Islands. I wish Northern Cross and her new owner the best of luck, adventure and exploration. I will leave the blog up for further reference for other builders, but will not be making additional posts.
Best to all,
Brent
This may come as a big surprise to many of my readers, but I’ve decided to put Northern Cross up for sale.
This has been a very difficult decision for me and one that I’m still not entirely comfortable with but I’ll attempt to explain…
Northern Cross is an excellent exploring boat and does everything she was designed to do, other than sail. Sailing is a funny thing. It’s a pain in the butt, but somehow has a hold on my heart. I’ve got my eye on a Com Pac Eclipse sailboat and I can’t fit both of these boats in my garage. I’ve decided to put Northern Cross up for sale to bring in needed money to save and buy a Com Pac Eclipse sailboat.
If you’ve read my blog, you know I’ve put my heart and sole into building Northern Cross. She’s the best boat I can build. Countless hours and money have gone into making her as beautiful as I able to create. She’s always been stored out of the weather in my garage and looks brand new. If you have interest in Northern Cross please give me a call to discuss at 208-589-1222. I’m looking to get $15,000 out of her. This would be to recover my hard costs adding little to nothing for my labor.
What’s Included:
This is really everything as it sits in my garage in Rigby, Idaho. Please give me a call if you have interest.
Best, Brent
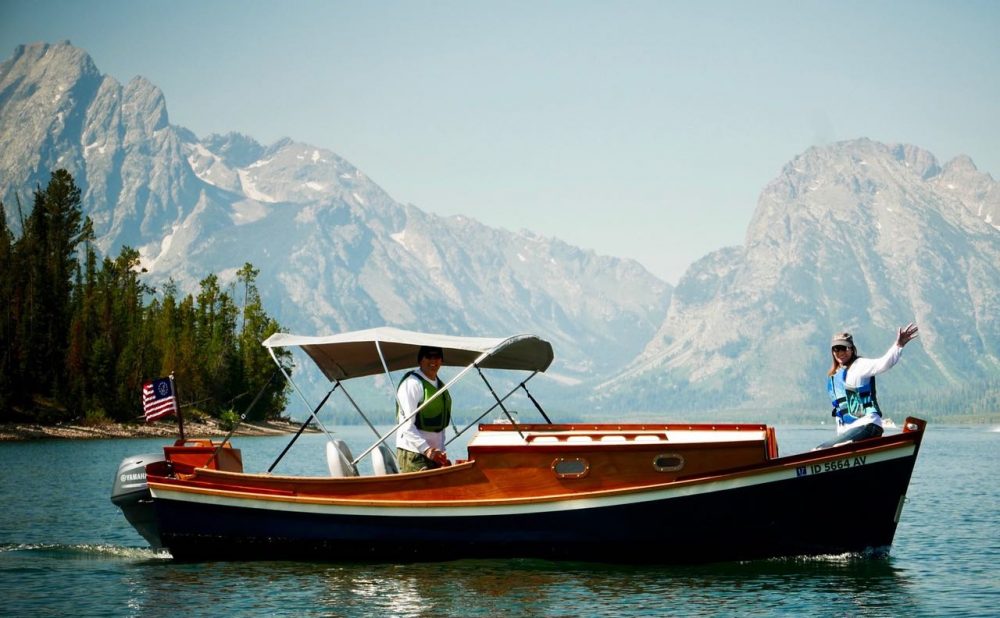
They’re beautiful lakes in the Rocky Mountains. Jackson lake ranks among the most scenic.
Northern Cross resting peacefully in Colter Bay.
Approaching Moran Bay, Teton National Park

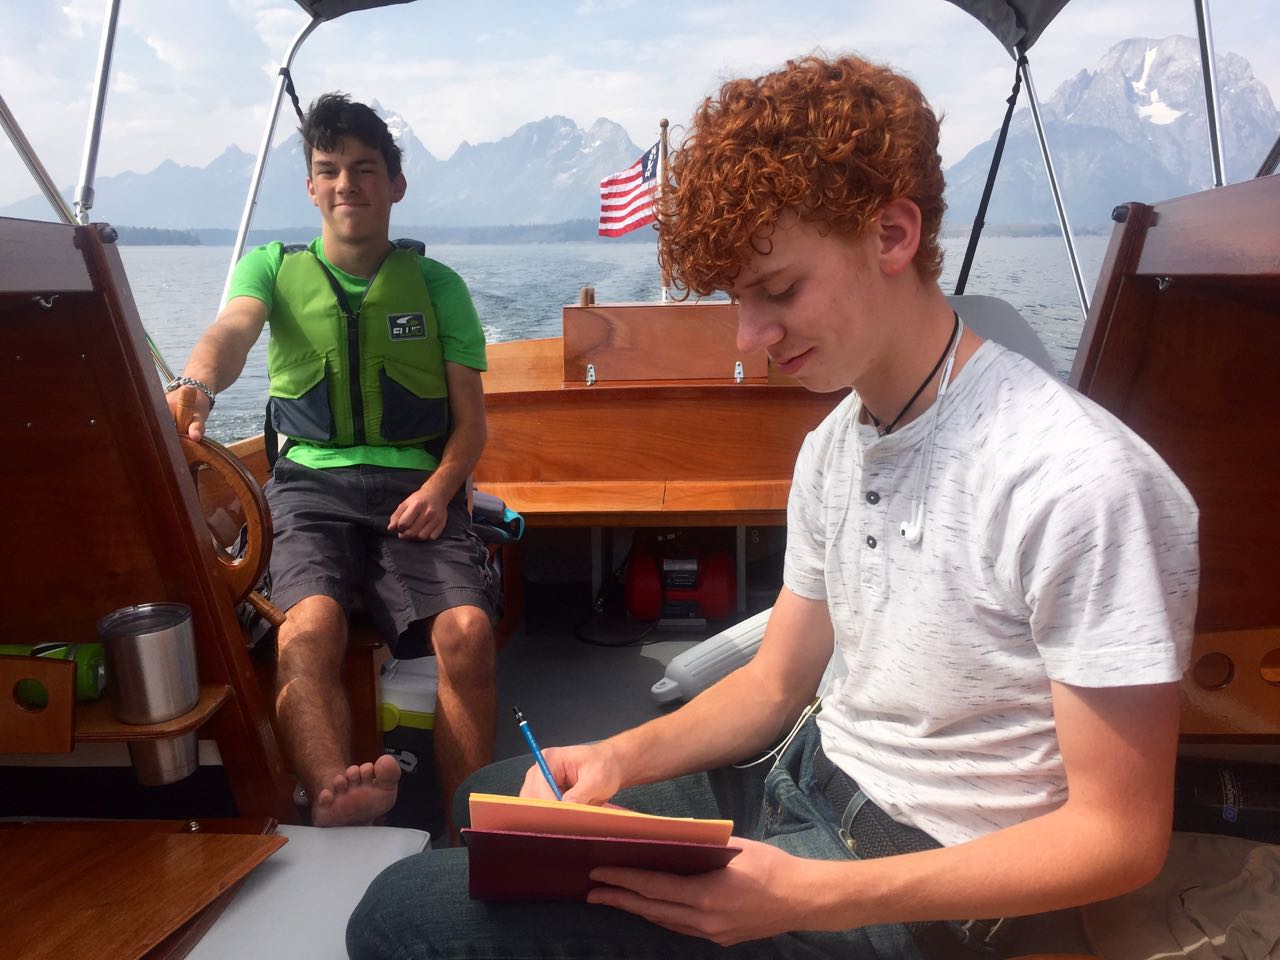
We got a lot of looks with our classic wooden boat.

Johnny Walker with his modified Balanced Cat Ketch rig on Scamp #24. Jonny’s had a lot of experience sailing with his family and developed a unique Scamp to suit his voyaging philosophy.

Scamp #24 had lots of mods and was even powered by a through transom electric motor

Hal powering around on his SUP/chair combo amongst fellow boaters. Hal’s a mountain climber, sailor, kayaker, boat builder and good conversationalist. His athleticism defies his age.

Skiff America’s flat bottom beaches with ease. Here we took some time to explore the shore and take a nap.

Jennifer exploring a small bay off the South end of Jackson lake.
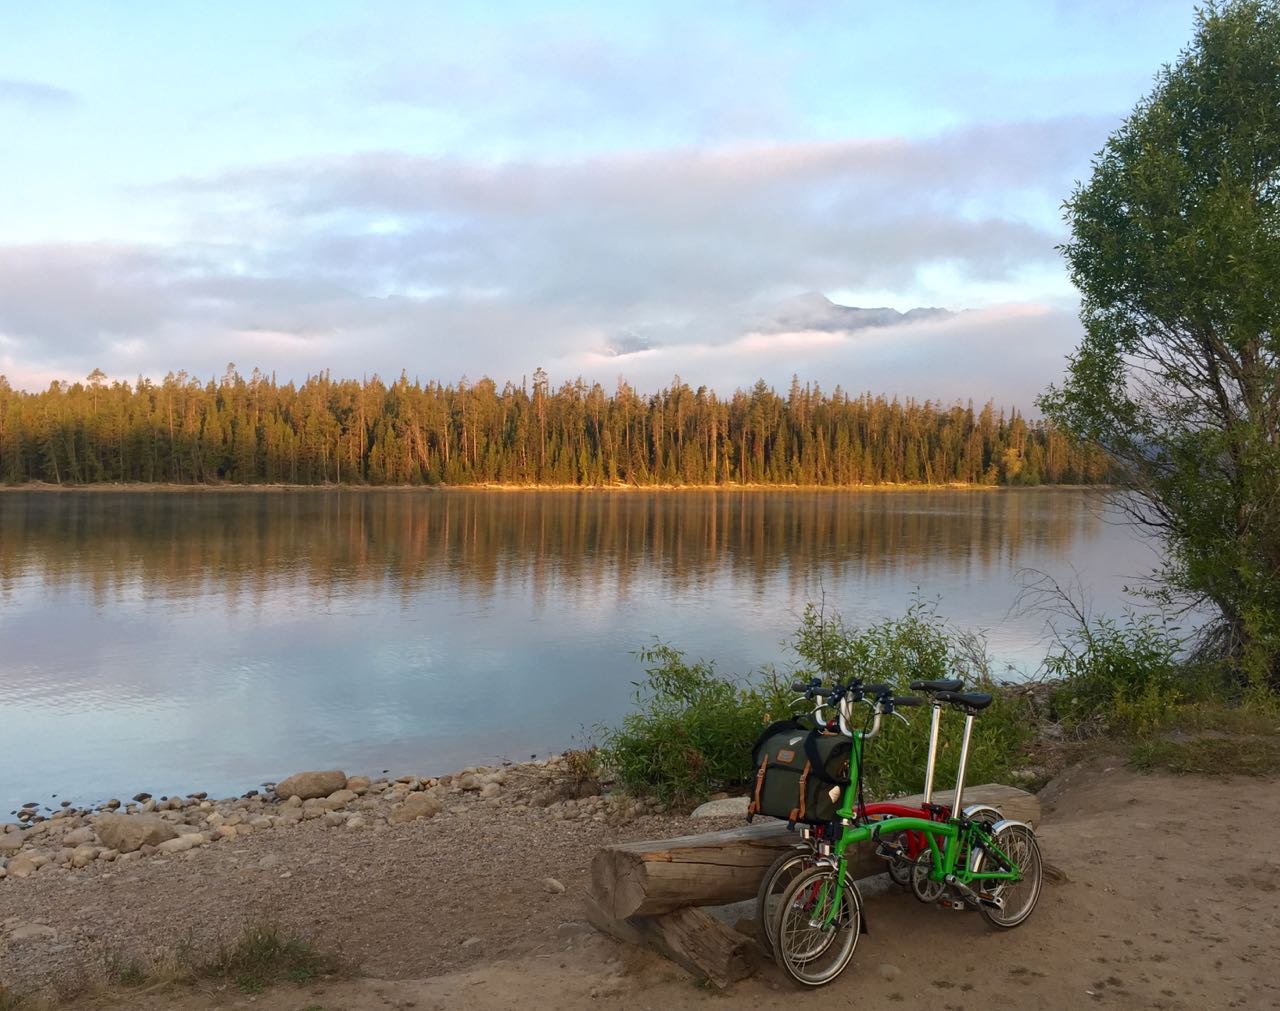
The folding bikes (Brompton’s) worked well to access more scenic vistas.

We secured the bikes on the dock and cruised away on our Skiff. This made us feel quite hip.

At this high altitude, the weather can change in an instant.

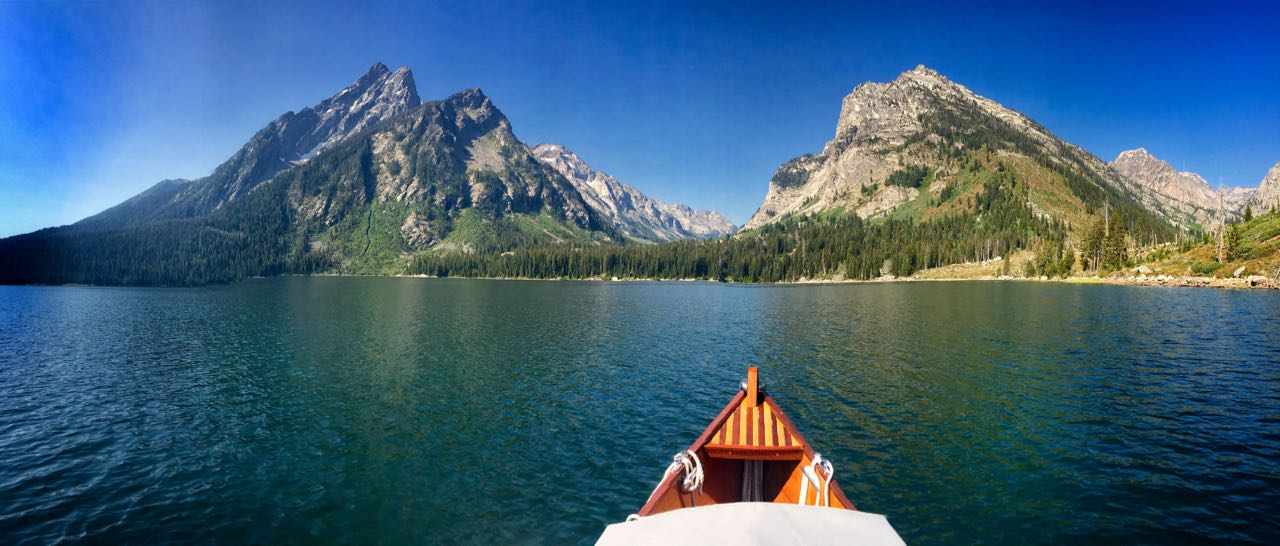
The bow works well for photography

Paul Breeding aboard Northern Cross traveling into Moran Bay. He’s the only guy I know (other than myself) who has built both a Scamp and Skiff America. It was great to meet Paul, after having had many phone conversations with him over the years.

You’ve got to see Moran Bay in person to appreciate the majesty of this peaceful remote bay.
I had so much fun on this lake, I came back a few days later with my dad and 2 of my sons. Bennett loves to drive.

Here we are going where only kayaks can go. We floated through 8″ of water to access another bay on the lake. That’s a kayak coming in behind us. They were amazed we could make this passage. With the motor raised, we paddled right through.

It rained and hailed for a few minutes. My dad and sons take cover under the cabin. This is a very versatile boat that can change with the weather.
Summary:
Northern Cross has impressed me with every adventure I’ve pursued. It’s a boat that many misunderstand. It does what it’s designed to do and continues to amaze me with its versatility, efficiency, ease of towing, affordability and good looks, to name but a few of it’s virtues. You almost have to own this boat in order to understand it.
Today I got out with some of our kids to explore and play on a nearby reservoir.

The paddle boards proved a huge hit.


We hauled two paddle boards across the back of Northern Cross. The didn’t move an inch.

We offset the fins and placed the paddles across the top.

Bennett loves to drive.

The older kids blasted the tunes inside the cabin. We all had a great time.

The cabin cover proved an excellent place to get out of the sun. By removing the filler boards, you still get good air movement through the cabin.
Parting Shot:

It doesn’t get much better than this folks. A great time was had by all.
What we learned:
Summary:
My kids had so much fun on our Skiff America. It was very rewarding for me as the builder to see my kids having so much fun on a boat I built. I’m very impressed by the design and functionality of this simple, affordable water craft. We spent $9 dollars in gas for this excellent outing. Amazing, just simply amazing. Kilburn Adams, thank you for designing this most excellent boat!
Hebgen Lake is a beautiful, large mountain lake minutes out of West Yellowstone. Jennifer and I spent Friday exploring this beautiful lake.
Check it out:


The cabin offers tremendous wind protection with the front filler boards in place. The lap trays worked extremely well for multiple uses.

The No Feed Back Steering system allows you to steer by shifting your weight. This makes it very handy when motoring.

Here I’m standing in the cabin footwell, steering by shifting my weight. This was a lot of fun.

Mountain Dew happens to be my preferred beverage of choice.

The front cushions provide a great place to kneel.

The bow breastplate is a great place for observing wildlife. We came upon several large pelican colonies.

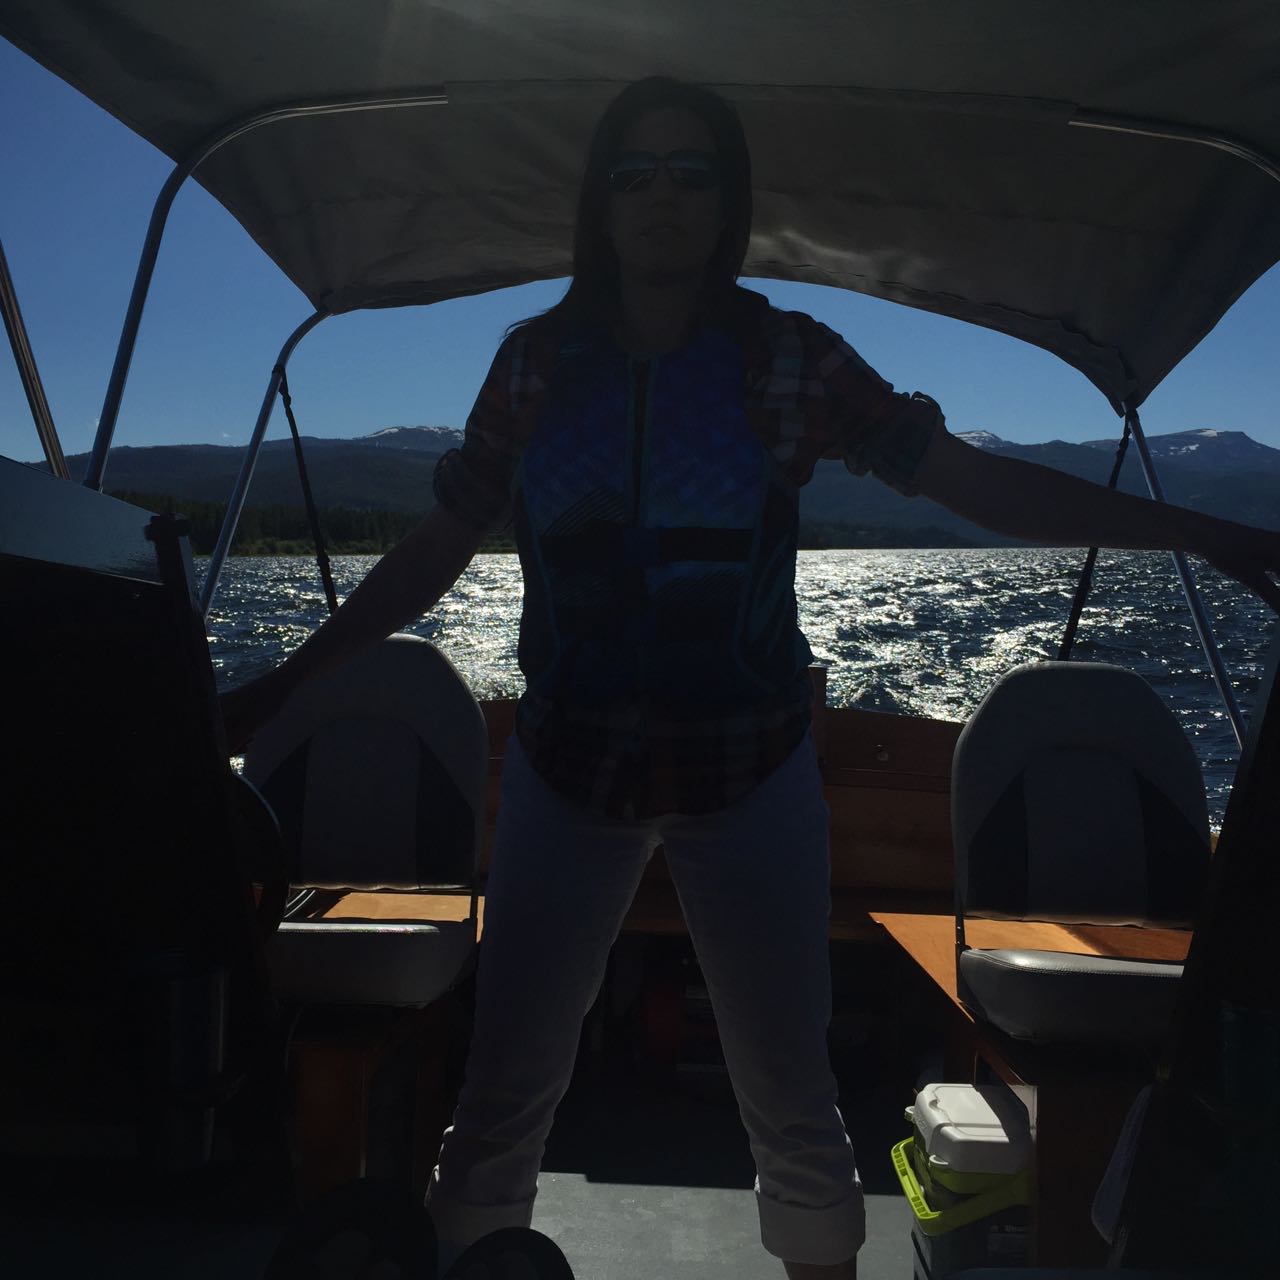
First Mate takes her turn at the wheel.
What I learned:
Summary:
This boat is going to be an excellent tool for exploring our mountain lakes.
Check it out:


The Bimini is folded back and resting on the motor cover, under the travel cover.

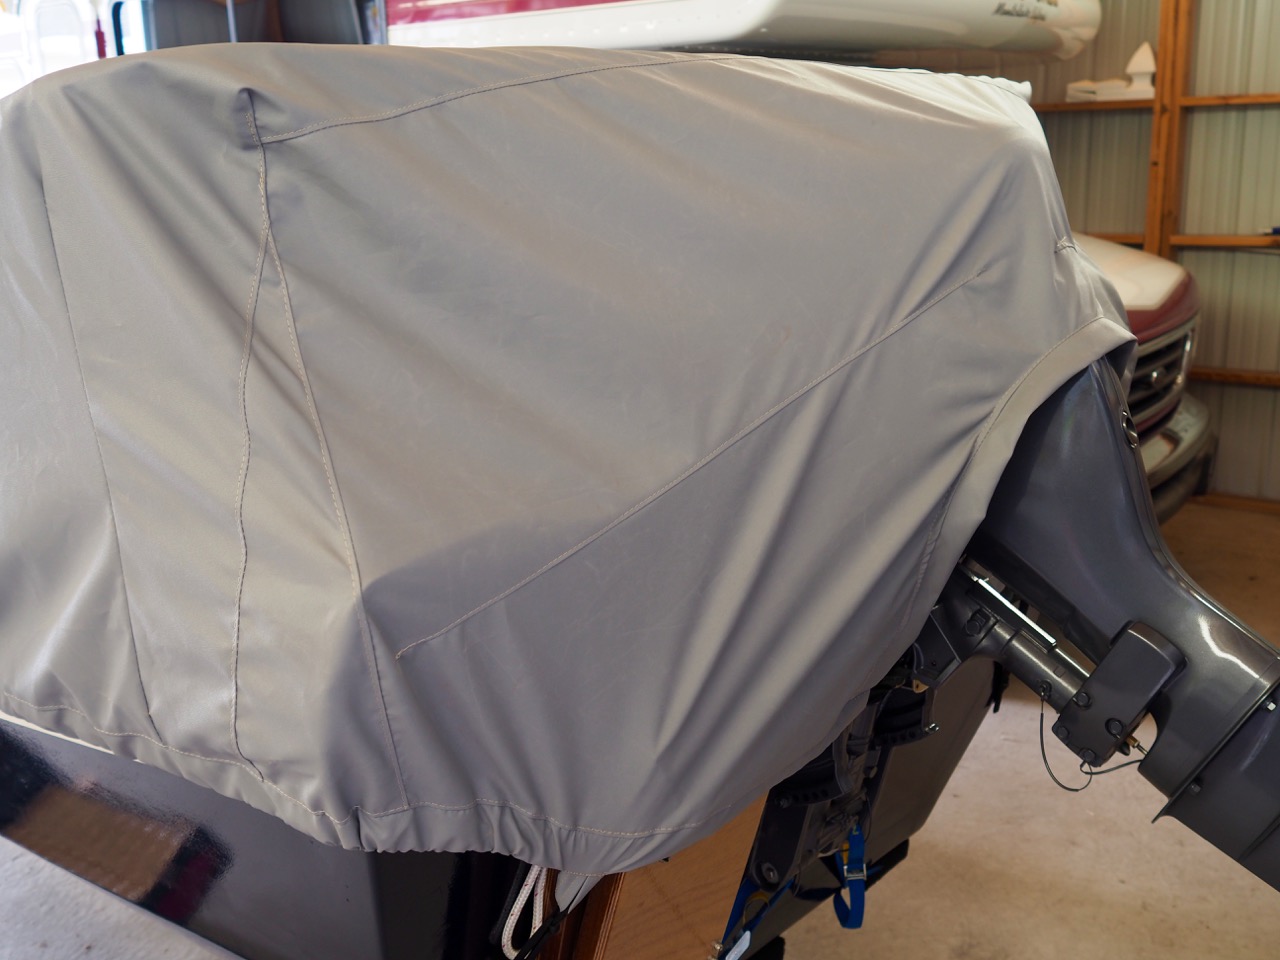
I love the way the travel cover wraps around the outboard.
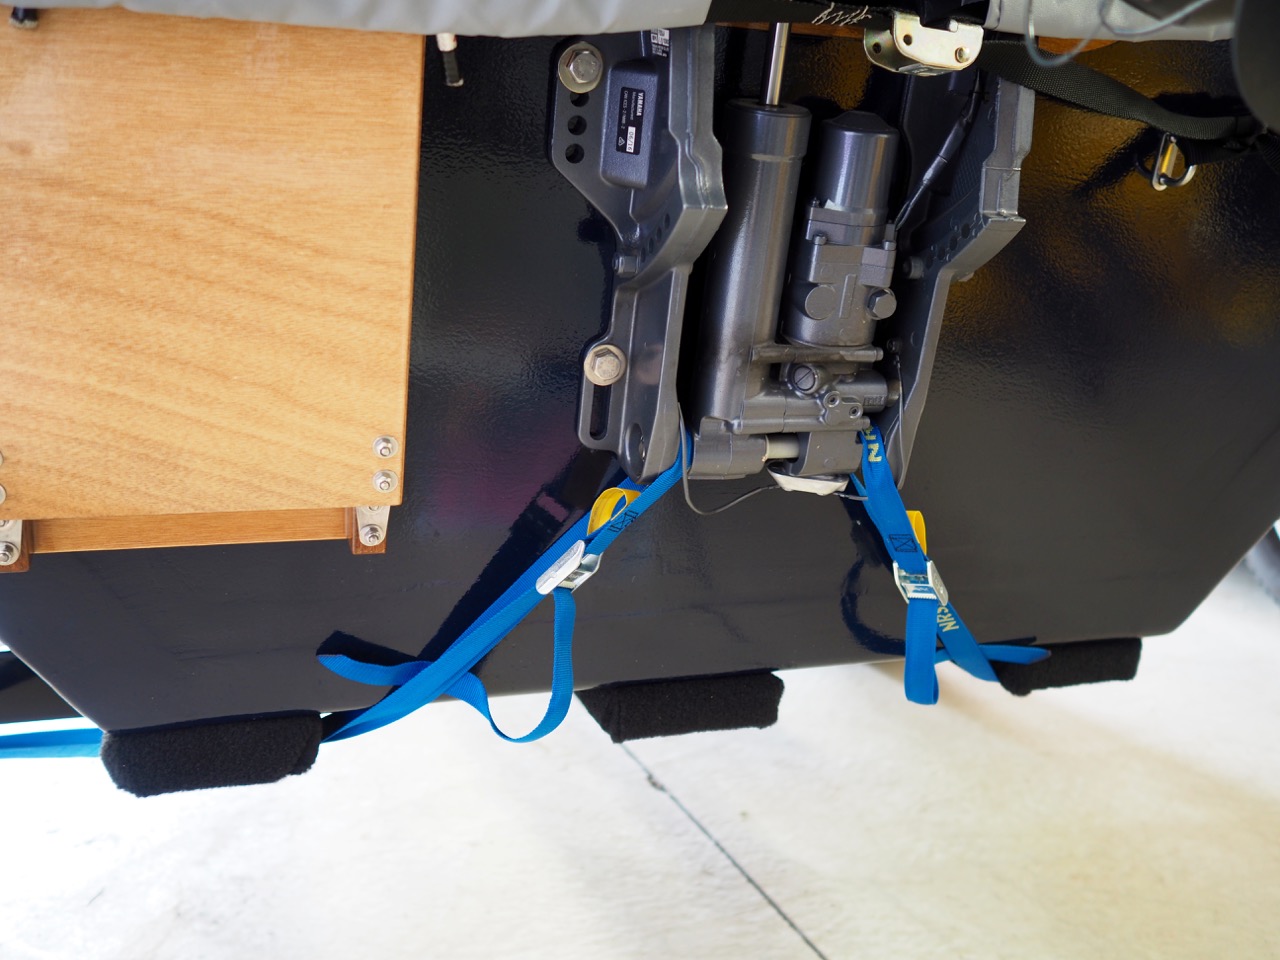
I secure the back of the boat to the trailer using 1″ river straps. They run under the hull and attach to D rings welded to the trailer. This prevents the boat from shifting from side to side. And, nothing is rubbing on the side of the boat.
Benefits of a travel cover:
Summary:
Today, I got the compass and stern tow hook installed…photos to follow. I now just need to attach my registration numbers and get in the water. It snowed here last night in God’s country. So much for global warming.
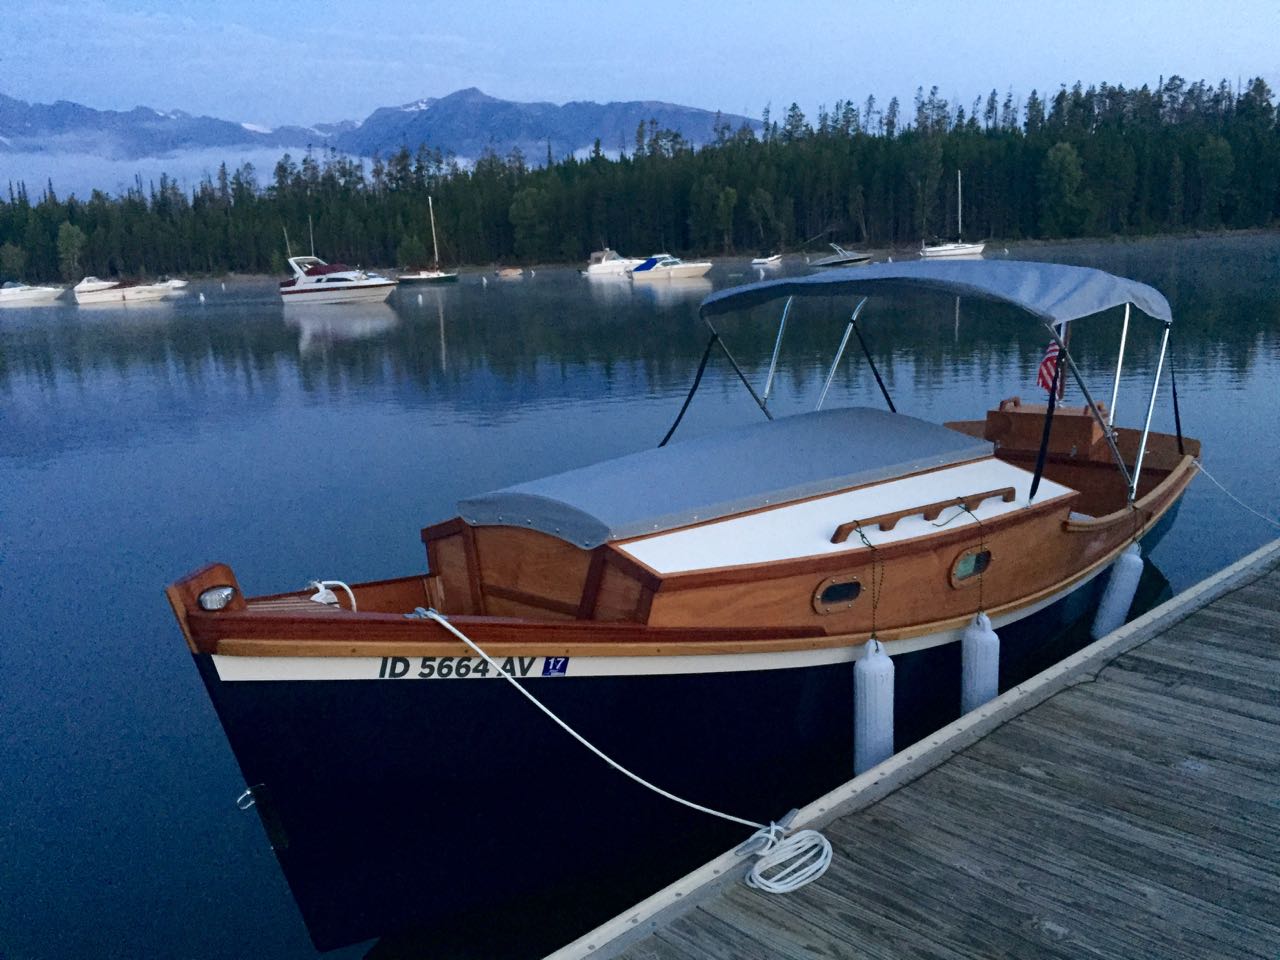
Northern Cross is back from the upholstery shop.
Check it out:
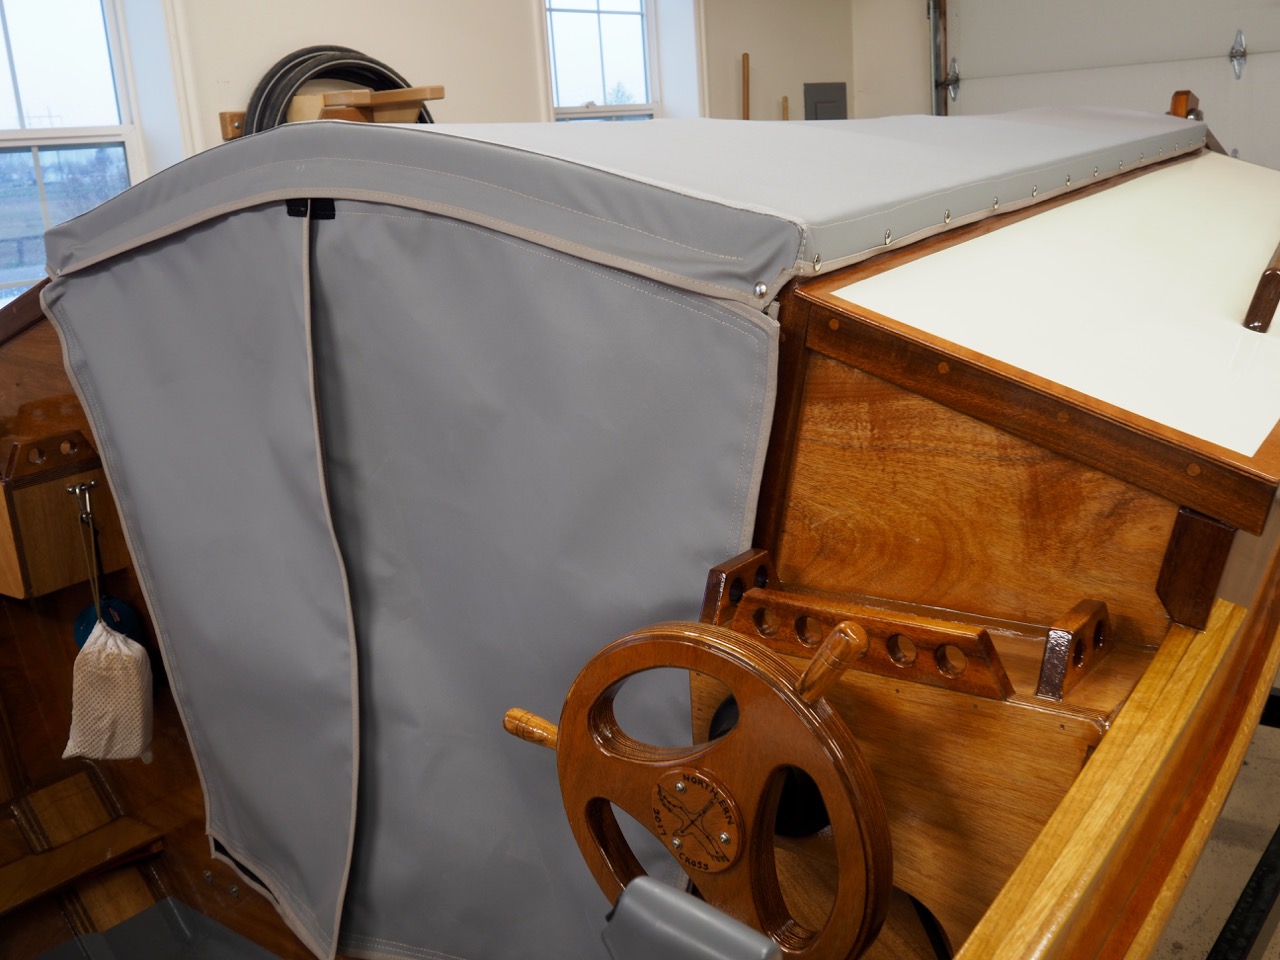
Cabin top in stormy weather configuration, buttoned down for the night. The vertical bulkhead panels are velcro’ed around the edges.

The cabin top secures with snaps…

wrapped down around the cabin walkway.

I wanted a longer flap than normal on the front filler board, to keep water out of the cabin when driving down the road.

Cabin entrance with rain panels removed. The bug panels also remove by unzipping from the cover at the top edge.

The bug netting snaps back out of the way for easy entrance.

Bunk cushions were made from 3″ dense foam. They fit beautifully and still allow great access to storage below.
Now for the Bimini:

Bimini in the up position. It rests across the hand rails of the motor cover when traveling. I also have a travel cover that fits over everything that I’ll show in a later post.


Bimini in the up position. I held the Bimini forward in the cockpit to offer more protection when standing and motoring. It’s about 6′ in length.

After looking things over, we decided the best place to mount the Bimini, was directly onto the oak handrails. This widened the Bimini and kept the bars out of way of my elbows while also providing a little more shoulder room. It should also keep a little more water out of the boat.
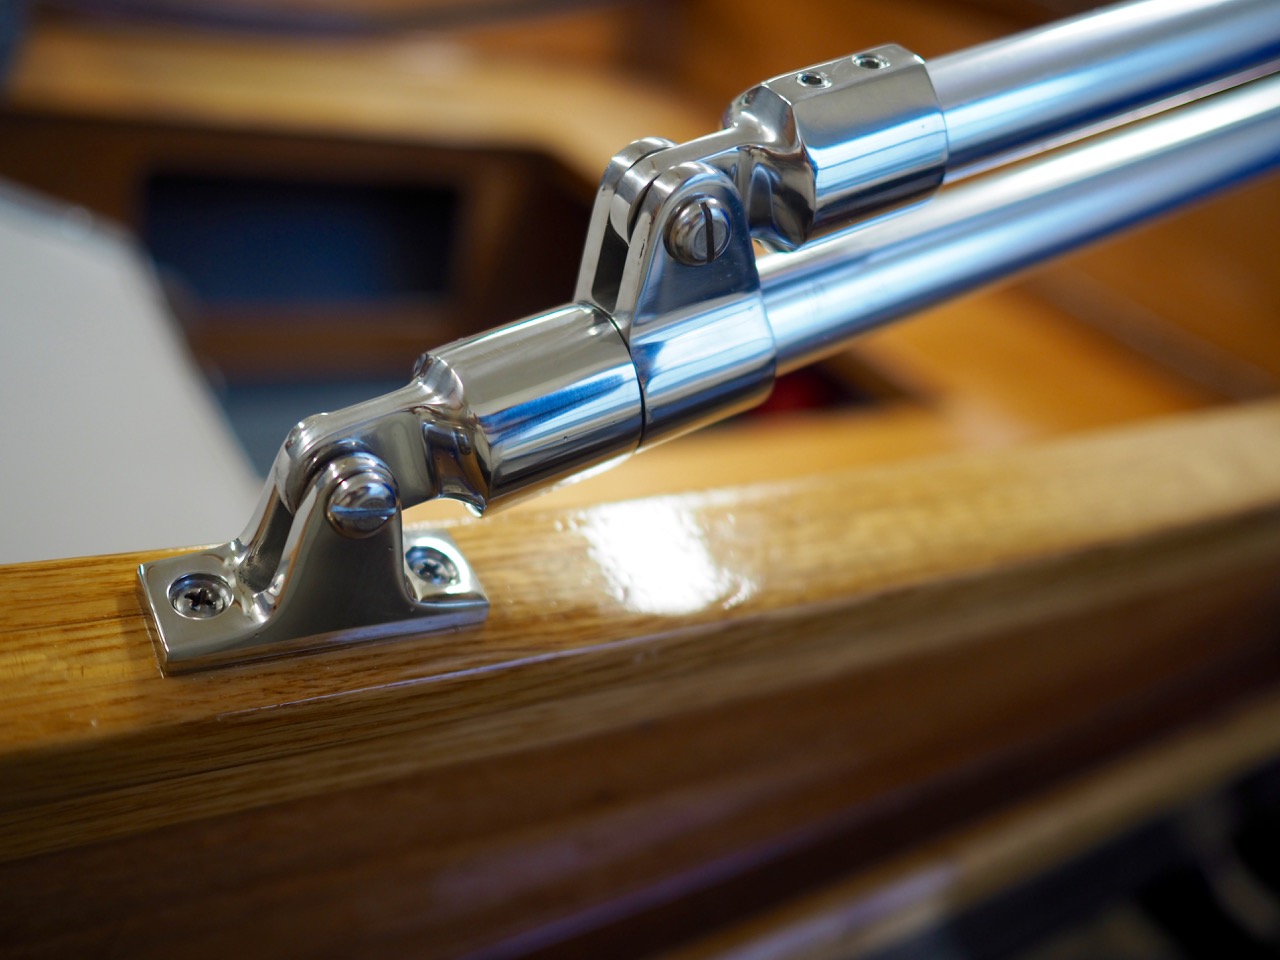
Stainless fittings secure the aluminum uprights. I applied lock tight to the screws to prevent them from vibrating out when traveling.

The Bimini was secured by screwing the webbing directly to the tubing. Though this might work fine , it didn’t seem secure enough to me.

Instead, I decided to wrap the webbing around the tubbing with simple knot.

I then replaced the screw to keep the webbing from shifting up or down the tube. With the webbing wrapped around the tubing, it’ll be much more secure.

I used stainless pad-eyes to secure the forward webbing straps.

The aft strap was secured in a similar way.
And, there you have it. Secure and solid.
Summary:
I’m now adding a compass to the bulkhead and a tow hook to the transom (for rescuing stranded ski boats on the reservoir). I’m all but done folks and it feels so good. I’m looking to get back on the water for the official launch early next month.
I love a lot of outdoor pursuits. Things like: backpacking, cycling, sailing, RV’ing, hiking, outdoor photography, rafting and nordic skiing. Near the top of this list is cycling, even better yet might be family cycling. When I speak of family cycling a few challenges immediately raise their ugly heads. You already know what the issues are: Things like keeping the kids happy, keeping the kids hydrated, keeping the kids on the right side of the road and keeping the kids motivated to push the pedals. At a young age, their attention span is simply too short, they lag behind and become uninterested. In fact, one of the biggest challenges of cycling with kids is keeping yourself from screaming at your kids instead of enjoying your kids.
So what’s the solution? Although not the only solution, the best solution from my way of thinking is a tandem. Yes, a bicycle built for 2. The benefits of the tandem riding with your kids are:
This leaves your child free to sing and tell stories as you cycle along at a much faster pace than otherwise possible. And, sing they will. Trust me, I’ve owned four tandems in my past and always been amazed at how children open up while riding a tandem.
But, tandems companies have fallen by the way side over the last decade or so, leaving fewer and fewer manufactures. Subsequently, tandem prices have risen significantly and many families have chosen to forgo this most excellent form of family togetherness. Additionally, many tandem manufactures have decided to cater to the high end performance market, leaving the availability of family tandems even further behind. As I have scoured the market for what I feel represents a great family machine for a fair price, I’ve found one offering that seems to stand out amongst the others.
First, Let’s review my family tandem criteria:
Here’s what we settled on:

Meet the DaVinci Grand Junction. This quality tandem, developed by DaVinci Cycles out of Colorado, will be our next wonder horse. Given our family size, we needed two. One bought one in size Small, the other in size Medium. My wife can captain the small, while I can captain the medium. This will allow us to attend tandem rallies and experience other trails with our youngest children in the stoker position.
Benefits of a Grand Junction:
Check out their web site for a host of other advantages. I’ll do a full review of these tandems once we log a few hundred miles. Let’s just say on paper, I’m sold.
Is it worth the expense?
You’ll need to answer that question for yourself. As for us, we’re dreaming of doing the C&O Tow Path and the Great Allegheny Passage with our kids. That trip alone would make this investment totally worth it to me. Add on all the local rides, along with tandem rallies and family cycling works out to be a very affordable form of family recreation. Let’s do this another way: For the price of one cheap ATV, you could buy 2 family tandems and do a ton of family riding, with very little continued expense. Your ATV will require yearly Off Road stickers, oil changes, tune-ups, a trailer to haul it and a tow vehicle to pull it. Not to mention another garage to store it. The list goes on and on. Family cycling teaching your kids a much healthier lifestyle. It teaches them to enjoy the simple things, to experience and appreciate nature. The quiet things of life that are so desperately missing from their daily lifestyles of texting and tweeting. And, might I add a much more sustainable lifestyle going forward. Yes, to us, it’s definitely worth the expense.
After looking at other options, I decided to mount the fire extinguisher under the port side bunk, next to the battery. Maybe this is a bad idea, if the battery explodes, but I can move it later if needed.

I used the battery strap to secure the fire extinguisher. There is room to slip the extinguisher out without loosening the strap. Notice the (2) 12V receptacles near the upper edge of the photograph. These will be handy to charge digital devices when motoring. Remember, the 25 Yamaha has an alternator for charging when motoring.
