Bimini, Cabin Top and Cushions

Northern Cross is back from the upholstery shop.

Check it out:

OLYMPUS DIGITAL CAMERA

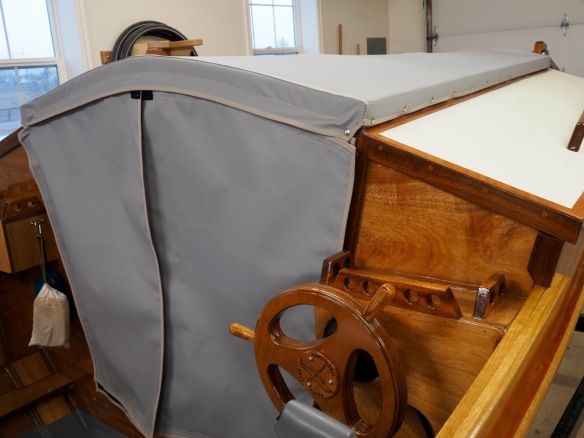
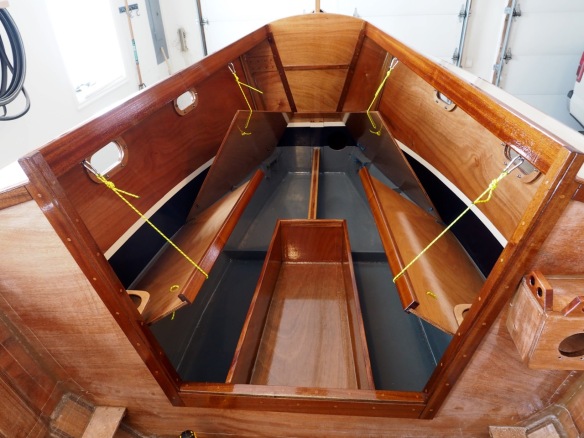
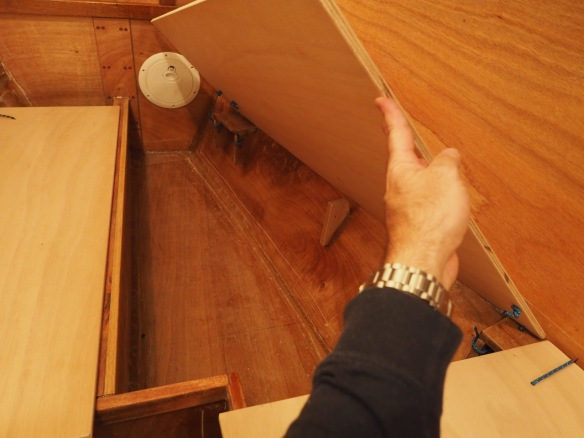
Cabin top in stormy weather configuration, buttoned down for the night.  The vertical bulkhead panels are velcro’ed around the edges.  

OLYMPUS DIGITAL CAMERA

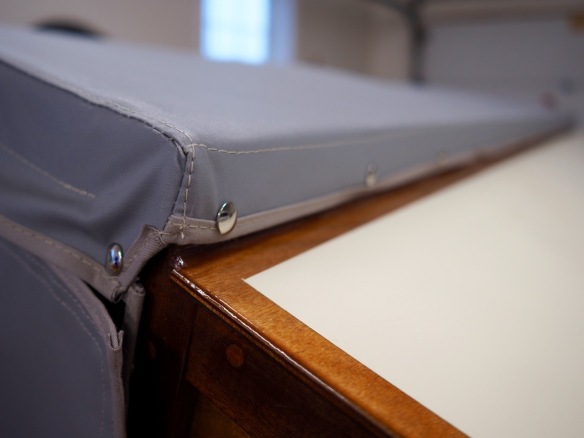
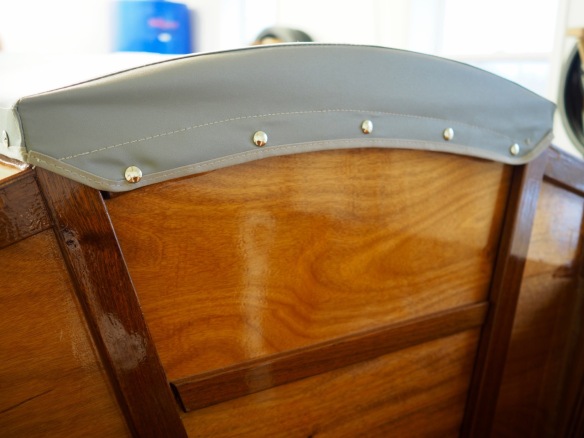
The cabin top secures with snaps…

OLYMPUS DIGITAL CAMERA

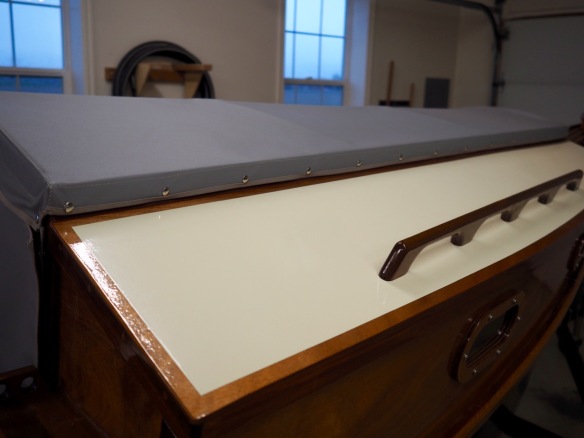
wrapped down around the cabin walkway.  

OLYMPUS DIGITAL CAMERA

I wanted a longer flap than normal on the front filler board, to keep water out of the cabin when driving down the road.  

OLYMPUS DIGITAL CAMERA

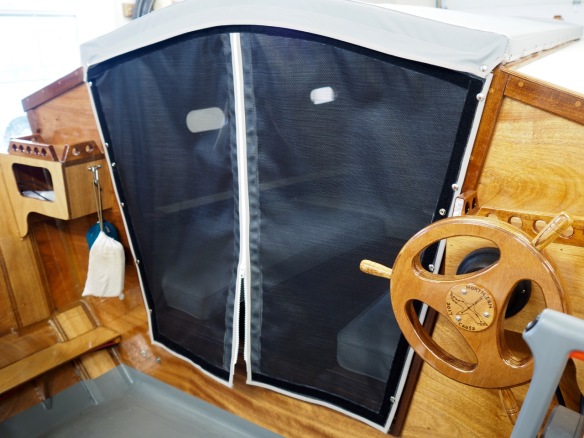
Cabin entrance with rain panels removed. The bug panels also remove by unzipping from the cover at the top edge.  

OLYMPUS DIGITAL CAMERA

The bug netting snaps back out of the way for easy entrance.  

OLYMPUS DIGITAL CAMERA

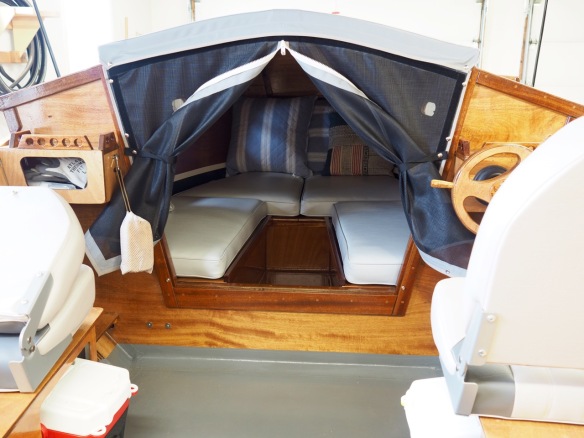
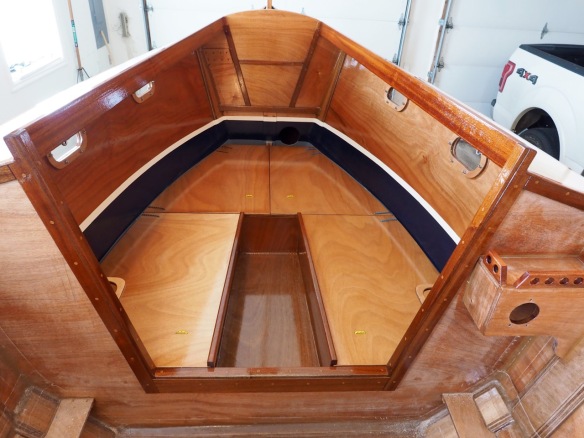
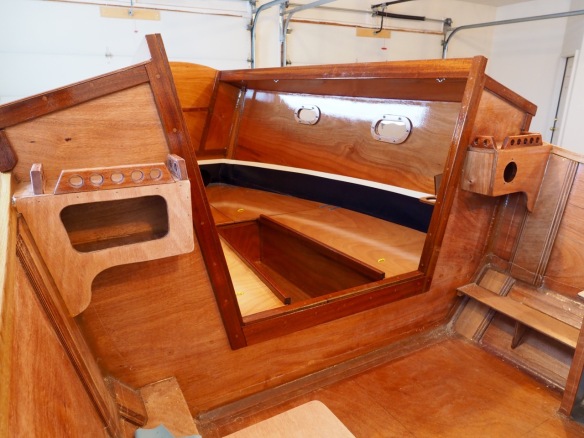
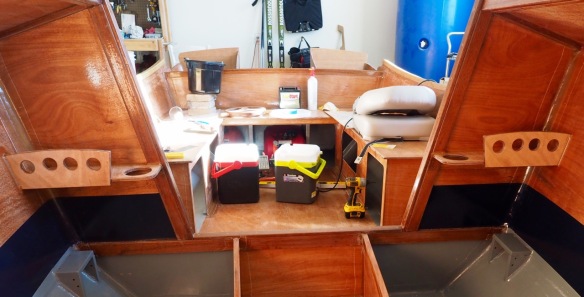
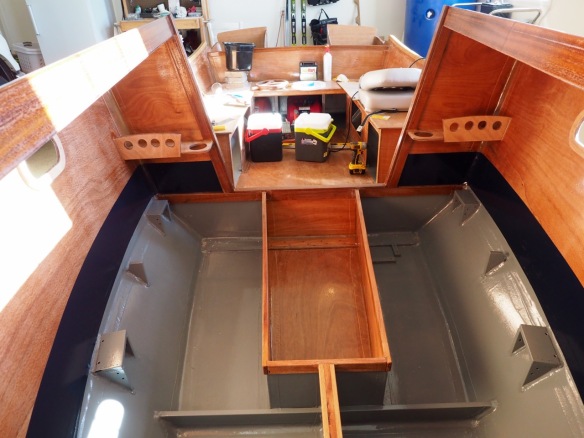
Bunk cushions were made from 3″ dense foam.  They fit beautifully and still allow great access to storage below.  

Now for the Bimini:

OLYMPUS DIGITAL CAMERA

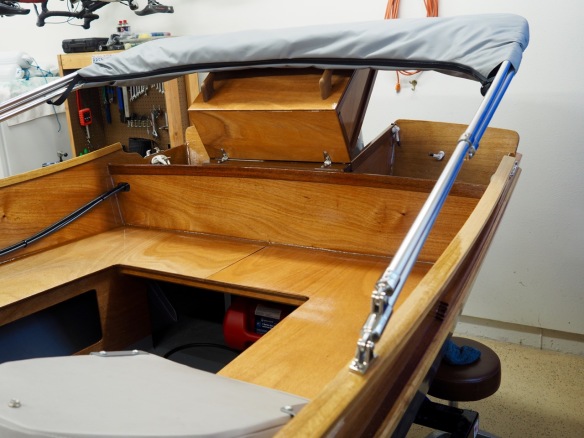
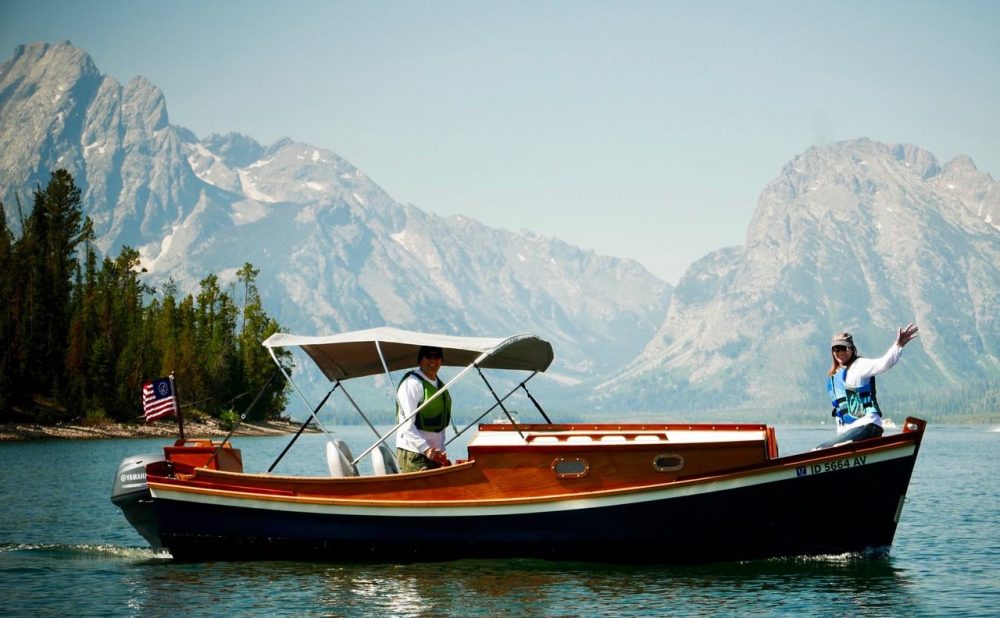
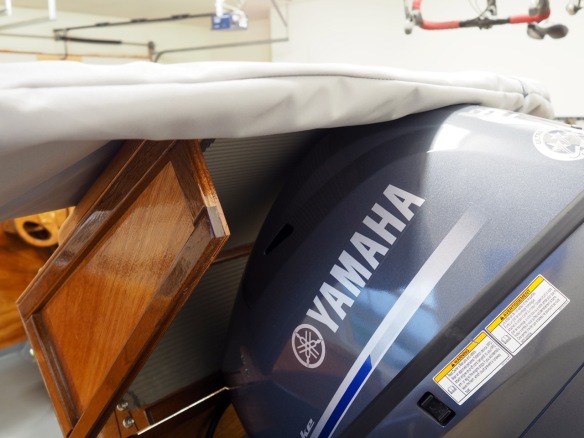
Bimini in the up position.  It rests across the hand rails of the motor cover when traveling.   I also have a travel cover that fits over everything that I’ll show in a later post.  

OLYMPUS DIGITAL CAMERA

OLYMPUS DIGITAL CAMERA

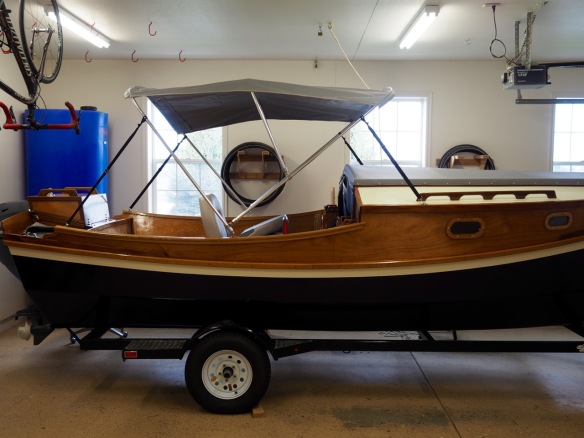
Bimini in the up position.  I held the Bimini forward in the cockpit to offer more protection when standing and motoring.  It’s about 6′ in length.  

OLYMPUS DIGITAL CAMERA

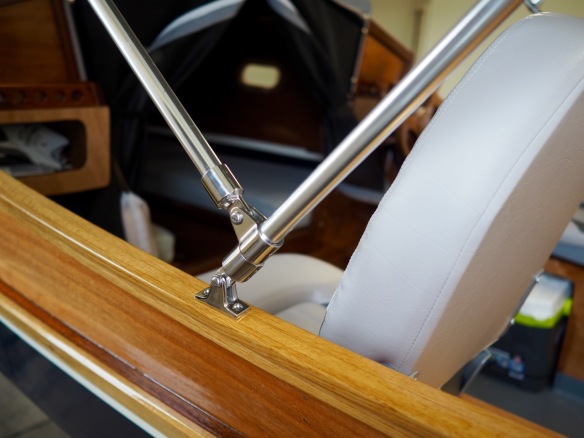
After looking things over, we decided the best place to mount the Bimini, was directly onto the oak handrails.  This widened the Bimini and kept the bars out of way of my elbows while also providing a little more shoulder room.   It should also keep a little more water out of the boat.  

OLYMPUS DIGITAL CAMERA

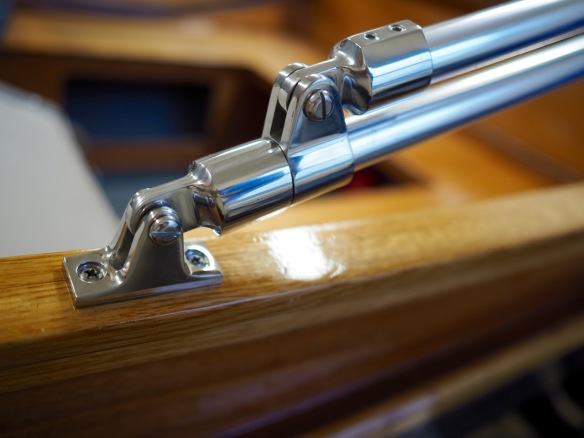
Stainless fittings secure the aluminum uprights.  I applied lock tight to the screws to prevent them from vibrating out when traveling.  

OLYMPUS DIGITAL CAMERA

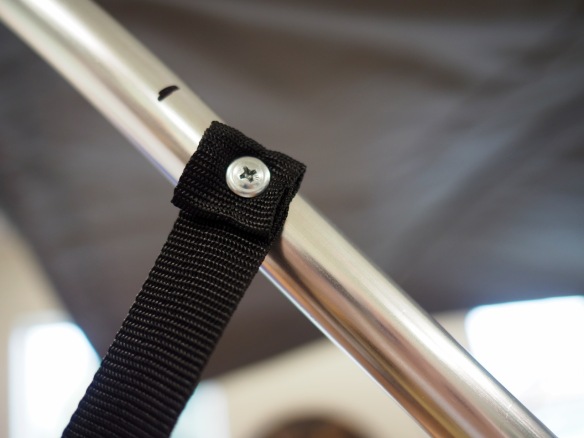
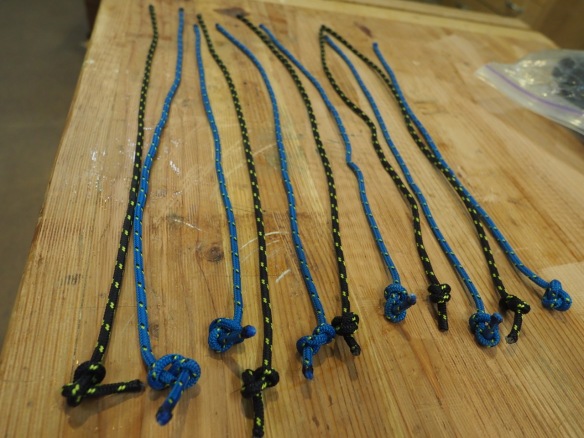
The Bimini was secured by screwing the webbing directly to the tubing.  Though this might work fine , it didn’t seem secure enough to me.  

OLYMPUS DIGITAL CAMERA

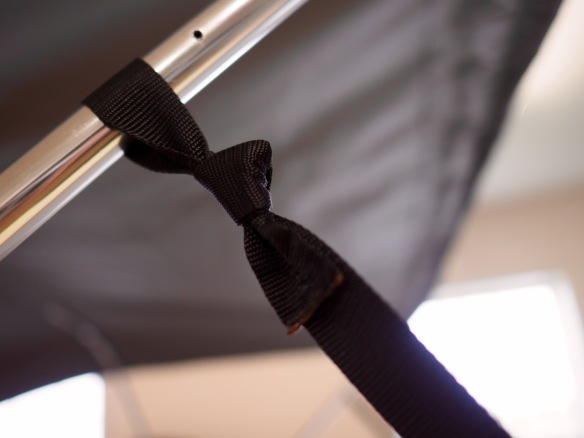
Instead, I decided to wrap the webbing around the tubbing with simple knot.  

OLYMPUS DIGITAL CAMERA

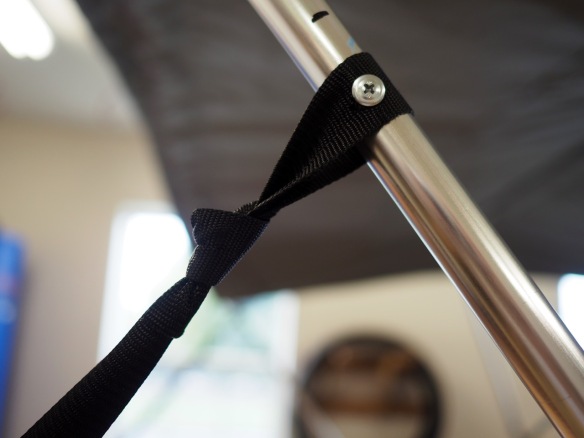
I then replaced the screw to keep the webbing from shifting up or down the tube.  With the webbing wrapped around the tubing, it’ll be much more secure.  

OLYMPUS DIGITAL CAMERA

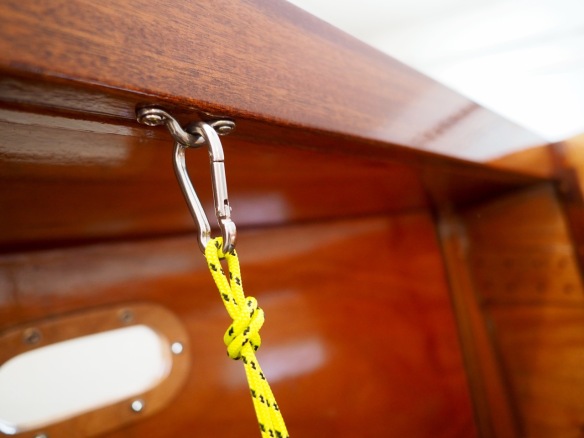
I used stainless pad-eyes to secure the forward webbing straps.  

OLYMPUS DIGITAL CAMERA

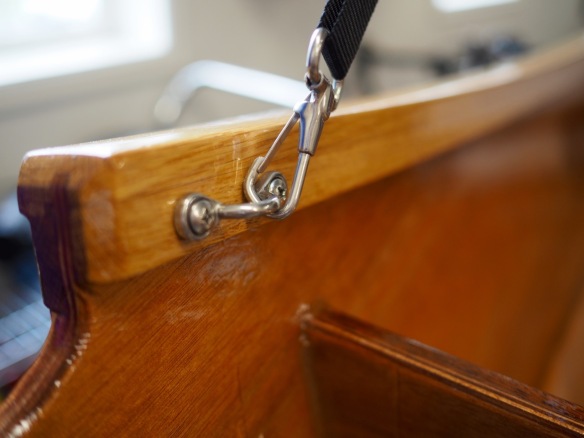
The aft strap was secured in a similar way.  

OLYMPUS DIGITAL CAMERA

And, there you have it.  Secure and solid.

Summary:

I’m now adding a compass to the bulkhead and a tow hook to the transom (for rescuing stranded ski boats on the reservoir).  I’m all but done folks and it feels so good.  I’m looking to get back on the water for the official launch early next month.  

Bunk Hatch Tethers & Navigator Console

With record low temperatures of -12 deg. Fahrenheit, we’re all trying to stay warm around here.  After running my shop heater for a couple of hours, I was able to get a few things done.

Check it out:

OLYMPUS DIGITAL CAMERA

I didn’t want to be a ‘one arm bandit’ when reaching for gear under the bunks, so I attached a line holding the bunk hatch up and out of the way.  I ran the line near the aft edge of the bunk so it can be reached and attached while sitting on the aft bunk hatch.  

OLYMPUS DIGITAL CAMERA

Stainless pad eyes with stainless carabiners proved a simple solution.  

OLYMPUS DIGITAL CAMERA

I ran the line under the bunks and secured it with a figure 8 knot.  

OLYMPUS DIGITAL CAMERA

All bunk hatches in the open position.  The night stands don’t allow the aft bunks to open as far as the forward bunks, but still quite workable.  Truth is the front bunks won’t open that far either once the sleeping pads have been installed.  I left plenty of line length for final adjustment of the tethers.

OLYMPUS DIGITAL CAMERA

I love how the cabin turned out with the navy and white stripe.  The stripes visually level out the cabin and hide the chine fillets.  

OLYMPUS DIGITAL CAMERA

Finally, I got the navigator console installed.  I’m now ready to focus on the cockpit.  Lots of control lines to run, holes to drill and seats to secure.  

Summary:

With the cabin virtually complete, minus the soft enclosure and sleeping pads, I’m ready to begin finishing the cockpit and construction of the boarding ladder.  I can feel this project beginning to give way.  It’s been such a rewarding build, I’m not sure I want it to end.  Still tons to do, but I’m definitely on track for a spring launch.  

Blue Tape Removed

Pulling the blue tape off an area you’ve painted is such a satisfying experience.

Take a look:

There’re a few places in the cabin where the white paint snuck under the tape, but only a few which I’ll touch up later.  I love the look of the Dark Navy and Hatteras Off White against the bright work.  Things are coming together nicely.  I’m very pleased with these results.

Now let’s all go enjoy our family and friends over this beautiful Christmas Season.

Cabin Paint, Ya Baby!

Well, after yesterday’s debacles, this morning went swimmingly well.  I wanted to get another coat of Hatteras Off White paint applied to the cabin top and inside cabin stripe.  If you remember, last time I tried this (with the paint slightly green) it ended up crazing and looked terrible.  I sanded this mess all off, applied one coat of paint, and waited for it to properly cure before attempting the second coat.

I’m happy to report, the second coat went on beautifully.

Take a look:

OLYMPUS DIGITAL CAMERA

Look Ma, no crazing!!!

OLYMPUS DIGITAL CAMERA

Notice the bicycle refection off the cabin top near the back.  I love bicycles.

OLYMPUS DIGITAL CAMERA

I also added a white stripe to the interior cabin.  

OLYMPUS DIGITAL CAMERA

Looking aft.  Things are starting to come together for Northern Cross.

OLYMPUS DIGITAL CAMERAOLYMPUS DIGITAL CAMERA

I’m almost ready to begin focusing on the cockpit.  But, first I want to get the cabin finished up.  I’ll be adding bunk retention lines to hold up the lids for hands free loading.  I also want to fix a place for the lap trays to store and add final touches to the thunder plank system.  This is the fun of building and creating your own boat.  You get to organize and accessorize till the cows come home– and I love it.

As you can tell, I’m feeling much better than yesterday.  Let’s all move forward in our lives and not get discouraged.  

Building Night Stands for Northern Cross

Well, OK not exactly night stands.  But a small organizational piece for each bunk within the cabin.

Pictures explain it better than words:

OLYMPUS DIGITAL CAMERA

The vertical face of the night stand.  I arched the top and cut an angle on both ends to match.  

OLYMPUS DIGITAL CAMERA

OLYMPUS DIGITAL CAMERA

An 1/8″ round over bit cleaned up the holes and edges.

OLYMPUS DIGITAL CAMERA

The horizontal piece forms a shelf.  The round cut out holds your insulated Yeti mug and the vertical face keeps items from falling off the shelf.  The holes in the vertical face lighten up the stands and create a nautical look to the project.  

What will I put on the night stands?

  • head lamp for reading
  • books and magazines
  • insulated mug holder
  • maps and field guides
  • knife
  • journal and pen
  • binoculars
  • cell phone
  • VHF radio
  • emergency weather radio

Summary:

I used 3/8″ okoume plywood to keep the stands strong yet lightweight.  The stands will be mounted on the forward side of the cabin/cockpit bulkhead about 12″ above the bunks.  They fit tight against the side panel and stop short of the companionway.  I love being organized and hate stuff lying around on the floor or bunks when I want to take a power nap.  These night stands will be effective in keeping things in their proper place.  

Color in the Cabin

I wanted to add a bit of color to the cabin for a few different reasons;  Color and contrast are always good for things meant to be beautiful, but I had another motive.  If you look at earlier photos, you will notice the interior glass tape laid across the chine panel seam is on an angle in comparison to the bunk tops.  This gave the illusion of the bunks being sloped, which is true.  But, by painting a flat line, as referenced off the bunks, it changes this perception and seems to level things out to the eye.

Take a look:

OLYMPUS DIGITAL CAMERA

Though the chine seam elevates toward the bow, the Dark Navy masks the line and levels things up.

OLYMPUS DIGITAL CAMERA

Above the Dark Navy, I plan to add a Hatteras Off White stripe, transitioning then to bright work.  

Now a little boat building philosophy:

When you undertake to build a boat, many feelings and visions flood through your mind.  They include areas where you plan to cruise and explore.  Others might be of the people you plan to take with you to share in the experience.

But, as every boat builder knows, some of the visions come in the form of you building a perfect boat without blemish.  Well, after building three boats, I can tell you that no boat will ever be built perfectly.  In fact, far from it.  But, who really cares?  Do you think a perfect boat would change your experience on the water?  Do you think your neighbors would be even more impressed if the boat was perfect?  No, they won’t even see the imperfections.  Frankly, they are too busy to even care.  You are the only one who cares to this extent.  Still, we strive to build boats as beautiful as possible, taking great care to get things right…and still the mistakes seem to manifest themselves all on their own.

An example:  When applying the second coat of Dark Navy to the cabin, I notice that I had a few sags from last nights application.  Too late now, with the last coat applied and the paint still wet.  Yes, I could sand it all out, but why?  Arn’t these boats to be enjoyed?  Won’t they get dinged up at docks and through normal wear and tear?  If we are stuck on building perfect boats, we should double our build time and never even launch them but instead place them carefully in a museum for others to gawk.  Is this why you built your boat?  I think not.  I built my boat to explore the natural world and see new sights with my wife, family and friends.  Given this end result, I want everyone who has ever built a boat to pat themselves on the back and get outside and use their wonderful creation.  Let’s not let the product lord above its intended use.  Get out in your boat, love your boat and be proud of the work you’ve done on your boat.  Fact is most people would never have attempted something like building a wooden boat.  Most folks would’ve never gotten off the couch.  I’m very thankful for Kilburn for designing this boat and I’m very grateful I had the opportunity to build a Skiff America.  I hope you feel the same way about your boat.

Filler Board Work and Cabin Layout

After a quick dinner, I slipped out into the shop for the simple task of sanding and glueing parts to the front filler board.  Building this boat is a series of small daily tasks.  If you touch your boat daily, things seem to fall into place.

OLYMPUS DIGITAL CAMERA

You don’t need much clamping pressure when glueing with epoxy.  In fact, you’ll just dent the wood if you over tighten.  Light pressure is all that is needed.

I decided to add a bottom piece to the top filler board which will slip over the lower filler board.  This will create a shingle effect and keep the boards in the same plane.

Jennifer and I spent an hour just sitting in the cabin tonight, seeing how we would like to configure and use the limited space.  We made several decisions:

  1. We decided against the curtain rods and holders.  When you lean back against the side of the cabin, the curtain rods would definitely be in our way.  Furthermore, the top seems to be plenty strong without them.  And, in the end, they will offer very little privacy because the curtains won’t hang tightly against the window.  So, we’re nixing them.
  2. We want to utilize the forward side of the aft bulkhead to organize our personal belongings like:  book, cell phone, 2 way radio, head lamp, water bottle  etc.  I’ll now design something that won’t take up much space, but help to keep us organized.
  3. We will utilize the walkway between the bunks as a bathroom area when needed.  Details to follow.
  4. We want at least 4 large pillows in the cabin area for comfortable lounging.  This allows you to sit in a number of different positions comfortably.
  5. We want to rig up a simple line to hold the bunks lids open for hands free loading and un-loading.
  6. We want to design and build 2 small lap trays to be used as a multi purpose tools for tasks like:  Cutting cheese and salami…to support my travel journal when writing…as a lap desk when playing cards or looking over a guide book, etc.  Basically, a lap organizer tray.  They will store under the bunks up against the bunk longitudinal out of the way when not needed.

Summary:

Lots to think about when it comes to being comfortable on a boat.  If you spend a few hours just hanging out in your boat, envisioning how you can use the space, things start to come to you and systems can be worked out.  I feel our time on the boat tonight was well spent and it has given us several ideas which we can now incorporate.  

Have you hugged your boat today?


Rope Hinges, Bunk Edges

OLYMPUS DIGITAL CAMERA

I had 3/16″ line left over from rigging Scamp.  I cut the line to 20″ lengths.

OLYMPUS DIGITAL CAMERA

I used a round rasp to form the rope notch in the bunk tops.

OLYMPUS DIGITAL CAMERA

The ropes are secured under the bunk tops with a figure 8 knot.

OLYMPUS DIGITAL CAMERA

The idea is to have the rope angled at 90 degrees off the edge of the hull.  

OLYMPUS DIGITAL CAMERA

OLYMPUS DIGITAL CAMERA

The front bunks can easily be lifted by grabbing the exposed aft edge of the panel.  

OLYMPUS DIGITAL CAMERA

I plan to rig up some sort of retention system to hold the lids in their open position for 2 handed loading.  

OLYMPUS DIGITAL CAMERA

I then milled out the edges pieces which will hold the pads in place.  

OLYMPUS DIGITAL CAMERA

Once cured and sanded, I’ll varnish these panels on the bench top.  

Summary:

The cabin layout was the last big design consideration for my Skiff America.  I very happy with the way it turned out.  The amount of storage in this area is very impressive.  I can now begin to think about all the remaining small details like cabin curtain rods, consoles, bimini attachment points and outboard motor cover.  

Bunk Supports Complete

This was actually quite a difficult step.  I was hemmed in on both ends trying to cut a board that had a:

  1. Curving bottom line
  2. Flat sloping top line
  3. Angling inward toward the forward end
  4. And, both vertical ends requiring cut outs

As it began to fit, the angles all changed, leaving you wondering how to cut it longer.

OLYMPUS DIGITAL CAMERA

This portion of the panel was cut too short to fit tightly against the bulkhead.

OLYMPUS DIGITAL CAMERA

Kilburn would say, “Well, it’s wood isn’t it?”

OLYMPUS DIGITAL CAMERA

“Just cut a little piece to fit the gap”.

OLYMPUS DIGITAL CAMERA

With wood and thickened epoxy, you can fix just about anything.

OLYMPUS DIGITAL CAMERA

When I get ready to install a panel like this, I lay everything out, like I’m prepping for surgery (no, I’m not a doctor).  All the glass is cut to length.  All fillet bags are ready.  Notice my roller, ready to roll epoxy onto the glass tape.

OLYMPUS DIGITAL CAMERA

I like to mark the panel location with a sharpie, so I can roll epoxy over all the fillet areas.

OLYMPUS DIGITAL CAMERA

The front joints require a notch to fit properly.

OLYMPUS DIGITAL CAMERA

I laid 3″ glass over all the fillets on both sides of the panels.  This should really stiffen up the forward portion of the hull.

OLYMPUS DIGITAL CAMERA

I held the aft top edge shy of the bulkhead cutout by 1/2″.  This will allow the bunk top to fit flush with the bulkhead cutout.

OLYMPUS DIGITAL CAMERA

Looking forward.  The bunks are designed to slop downward toward the bow.  This is probably to keep your feet below your head when sleeping.  Good design Kilburn!!

Summary:

I’ll roll another coat of epoxy over all the glass before it fully cures and then turn my attention to the hull bunk supports.  I’ve decided to build the bunk supports and hinging mechanism exactly as Kilburn designed.  I’m continually impressed with Kilburn Adams design work on this boat.  Kilburn, if you’re reading this blog, I hope to meet you some day in person and thank you for this most excellent boat design.  

Heck, how about coming out to Idaho for a wooden boat mess about?  And, you could bring Bill along too.